Introduction
Are you looking to create beautiful curls or beachy waves? A curling iron is a fantastic tool to help you achieve a range of stunning hairstyles at home. In this article, we’ll explore how to use a curling iron to create effortless beach waves, long-lasting curls, and more. Not only will we provide you with step-by-step instructions, but we’ll also highlight some of the most common mistakes to avoid and offer tips from experts to ensure the best possible results.
How to Use a Curling Iron for Beach Waves
Beach waves have become incredibly popular in recent years, and for a good reason. They’re a relaxed yet chic way to style your hair for any occasion. Here’s how to create beach waves with a curling iron:
Step 1: Start with Dry Hair
Start by ensuring that your hair is clean and completely dry. Blow-drying your hair beforehand ensures that your hair is smooth and tangle-free.
Step 2: Section Your Hair
Section your hair into smaller sections to ensure that the curls are evenly distributed. Start by parting your hair down the center or wherever you usually part it.
Step 3: Apply Heat Protectant
Before you start curling, apply a heat protectant, such as a spray or foam, that will help prevent your hair from getting damaged by the heat.
Step 4: Heat Up Your Curling Iron
Turn on your curling iron and wait for it to heat up. For most curling irons, a temperature of 350-400 degrees Fahrenheit is recommended.
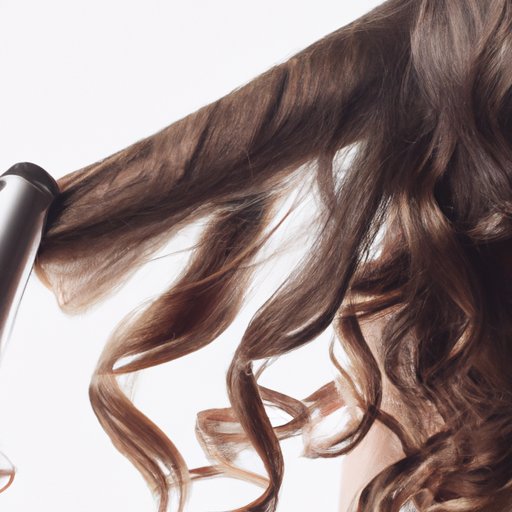
Step 5: Curl Your Hair
Starting with the bottom sections, place a small section of hair in the curling iron and twist it in the direction away from your face for five to ten seconds. Afterward, release the hair from the curling iron and let it cool down before moving on to the next section. Repeat this process for each section, alternating the curl direction to create a more natural look.
Step 6: Apply Finishing Spray
Once you’ve curled all your hair, apply a finishing spray to help hold the curls and prevent them from falling out.
Recommended Products and Tools:
When creating beach waves with a curling iron, it’s essential to have the right products and tools. Here are some recommendations:
- Curling Iron: Hot Tools Professional 24K Gold Curling Iron
- Heat Protectant: Living Proof Restore Instant Protection
- Finishing Spray: Oribe Superfine Strong Hair Spray
Top Tips for Curling Iron Beginners
Using a curling iron can be intimidating for beginners. Here are some tips to get you started:
Choosing the Right Curling Iron for Your Hair Type
There are various types of curling irons, such as ceramic, tourmaline, and titanium. Be sure to choose a curling iron that suits your hair type. For example, tourmaline and ceramic curling irons work best for fine, thin hair since they produce less heat. Titanium curling irons are ideal for thick hair as they can handle high heat levels.
Preparing Your Hair Before Curling
Before using a curling iron, it’s essential to prepare your hair properly. Start with clean and fully dry hair. Your hair should also be tangle-free.
Tips for Mastering the Curling Technique
When using a curling iron, it’s important to use the right technique. Start by wrapping small sections of hair around the curling iron for a few seconds, then letting them go. To create looser curls, use larger sections of hair and hold them for a shorter period.
How to Adjust the Curls’ Size, Direction, and Tightness
When curling your hair, you can adjust the size, direction, and tightness of the curls. Larger sections of hair produce loose waves, while smaller sections create tighter curls. The curl direction also affects the overall style.
Mistakes to Avoid When Using a Curling Iron and How to Fix Them
When learning how to use a curling iron, it’s common to make a few mistakes. Here are some common mistakes and how to fix them:
Using Too Much Heat
Using a curling iron with too much heat can damage your hair, causing dryness and split ends. Be sure to use a heat protectant and adjust the temperature based on your hair type.
Not Using the Right Technique
The key to successful curls is the right technique. Be sure to wrap your hair around the curling iron correctly for the desired result.
Letting Your Curls Fall Out
If your curls are falling flat, try adding more time to the curling process. Additionally, be sure to use a finishing spray to hold your curls in place.
Expert Advice: How to Use a Curling Iron for Long-Lasting Curls That Hold
For long-lasting curls, it’s vital to use the right products and techniques. Follow these tips:
Tips for Selecting the Right Products to Help Curls Last Longer
When looking for products to help your curls last longer, opt for those designed for this purpose. Products like curl-enhancing creams, mousses, and gels can help hold the curls in place for longer.
Explanation of Different Curl-Setting Techniques and Products to Use
Using different curl-setting techniques and products can help you achieve different styles. For example, using a smaller barrel curling iron creates tight curls, while using a larger barrel creates loose waves.
How to Protect Hair from Heat Damage While Ensuring Long-Lasting Curls
Before using a curling iron, be sure to use a heat protectant to prevent damage to your hair. Additionally, avoid using too much heat and allow your hair to cool before using a comb or brushing it.
Quick and Easy Hairstyles You Can Achieve with a Curling Iron: A Beginner’s Guide
With a curling iron, you can create a range of quick and easy hairstyles. Here are a few examples:
Loose Waves
Create loose waves by wrapping your hair around the curling iron for a few seconds, then releasing the hair.
Tight Curls
Create tight curls using a smaller barrel curling iron, wrapping small sections of hair around the barrel and holding them for a few seconds.
Half-Up Half-Down
Create a half-up, half-down hairstyle by curling your hair and then pulling some of it up into a half ponytail.
Conclusion
Curling irons are fantastic tools, with the ability to create a range of stunning hairstyles. However, it’s crucial to use them correctly to achieve the desired results. If you’re new to curling irons, follow these tips, step-by-step instructions, and expert advice to ensure success. Remember, practice makes perfect, and with a little patience, you’ll be able to create beautiful curls and beach waves in no time at all.