Introduction
So, what exactly is a screenshot? A screenshot, also known as a screencap or screen capture, is a digital image of your computer, tablet, or phone’s display. It is a useful tool that allows you to capture a still image of what you see on your screen, which can be useful for a variety of reasons. Taking a screenshot on a Chromebook is a simple process, and in this article, we will be exploring the various methods that you can use to capture your screen.
Knowing how to take a screenshot on your Chromebook is essential, and it can save you a lot of time and effort when it comes to documenting and sharing information. Whether you’re using your Chromebook for work or play, it’s important to understand how to take a screenshot on your device. This guide will provide you with everything you need to know to capture your Chromebook screen using the quickest and most efficient methods.
A Step-by-Step Guide: How to Take Screenshots on Your Chromebook
There are a few different ways to take a screenshot on a Chromebook, and each method has its own pros and cons. In this section, we will be exploring all of the different methods that are available, along with step-by-step instructions on how to use each one.
Keyboard Shortcuts
One of the easiest and quickest ways to take a screenshot on a Chromebook is by using a keyboard shortcut. There are two keyboard shortcuts that you can use:
To take a screenshot of your entire screen:
Press Ctrl + Show Windows
To take a screenshot of a specific area of your screen:
Press Ctrl + Shift + Show Windows, then click and drag your cursor to select the area you want to capture.
Once you’ve taken your screenshot, it will be saved to your Downloads folder in PNG format. If you’d like to take a screenshot of the entire webpage, rather than just what’s visible on your screen, press Ctrl + Shift + F5.
Chrome Extensions
Another option for taking a screenshot on your Chromebook is to use a Chrome extension. There are plenty of screenshot extensions available in the Chrome Web Store, but one of the most popular is Lightshot. To use Lightshot:
Install the Lightshot extension from the Chrome Web Store
Click the Lightshot icon in your Chrome browser
Select the area of your screen that you want to capture
Edit your screenshot if required
Save your screenshot to your local drive, cloud storage, or share it online
More Advanced Methods
If you’re looking for more advanced ways to capture your screen on a Chromebook, there are a few other options available:
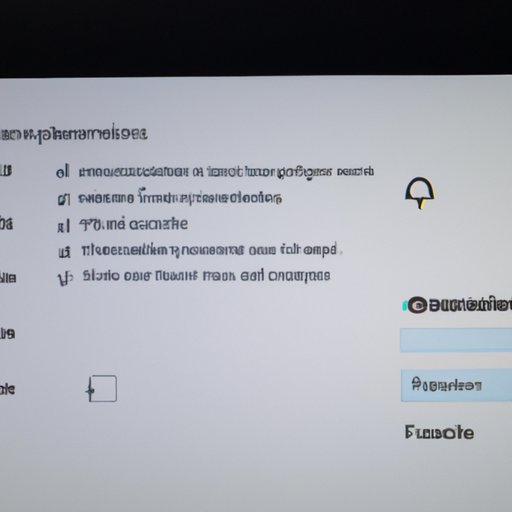
The built-in Chromebook screenshot tool
Your Chromebook comes with a built-in screenshot tool that can be found in your tools menu (the three dots in the top right corner). Click on “More Tools” and then click “Screenshot”. Once you click this, you can select the type of screenshot you want to take (full screen, partial screen, or window). When you select the part of the screen you want to capture, just click the “Capture” button.
Third-party apps
There are several third-party apps that you can use to take screenshots on your Chromebook. One of the most popular is Nimbus Screenshot, which allows you to take screenshots of web pages, as well as capture a specific region of your screen, the entire screen, or a selected window. You can also use it to annotate your screenshots.
The Quickest Ways to Capture Screenshots on a Chromebook
If you’re looking for the fastest and most efficient ways to capture a screenshot on your Chromebook, there are a few options that stand out:
Keyboard Shortcuts
The two keyboard shortcuts discussed earlier are the quickest and easiest ways to capture a screenshot on your Chromebook. Whether you’re capturing a full-screen screenshot or a specific region, using the keyboard shortcuts is a simple process that can be done with just a few clicks.
Chrome Extensions
Using a Chrome extension like Lightshot is another fast and efficient way to capture a screenshot on your Chromebook. Once the extension is installed, you can activate it with just a click and drag your cursor to select the part of the screen you want to capture.
10 Screenshot Tricks Every Chromebook User Should Know
If you’re interested in getting the most out of your Chromebook’s screenshot capabilities, here are ten tips and tricks that you should know:
- Use the “Save to Google Drive” option to automatically save your screenshots to the cloud.
- Use keyboard shortcuts to speed up your workflow.
- Use the built-in Chromebook screenshot tool to capture a specific window or object.
- Use third-party apps to annotate your screenshots, add labels and captions.
- Use image editors to customize your screenshots according to your preferences.
- Use screenshot extensions to save your screenshots to cloud storage, or share them online directly.
- Use the right file format (PNG or JPEG) depending on your needs.
- Use the touchscreen on your Chromebook to select the exact area you want to capture.
- Learn how to use the various screenshot-taking methods available to you.
- Use the “Undo” button to quickly revert your changes if you made an error during the editing process.
By following these tips, you can take your Chromebook’s screenshot capabilities to the next level, and make the most of this powerful tool.
Chromebook Screenshots Made Simple: A Beginner’s Guide
If you’ve never taken a screenshot on your Chromebook before, it can seem a bit overwhelming at first. This section provides a simplified guide that will help you get started.
Keyboard Shortcuts
For beginners, the easiest way to take a screenshot on a Chromebook is to use the keyboard shortcuts. To take a screenshot of the entire screen, press Ctrl + Show Windows. To take a screenshot of a specific area of your screen, press Ctrl + Shift + Show Windows, then select the area you want to capture.
Chrome Extensions
If you prefer to use a Chrome extension, Lightshot is an excellent option for beginners. Simply install the extension, click the Lightshot icon in your toolbar, and follow the instructions on the screen to capture your screenshot.
How to Take Screenshots on Your Chromebook Like a Pro
If you’re an advanced Chromebook user, you might be looking for more advanced techniques for capturing, editing, and sharing screenshots. Here are a few tips and tricks that can help you take your Chromebook screenshot game to the next level:
- Use a stylus to capture more precise screenshots.
- Use image editors to refine your screenshots and add annotations.
- Use cloud storage to automatically backup and sync your screenshots across all of your devices.
- Learn how to configure your Chromebook to take screenshots in the background or on a timer.
- Use advanced screenshot-taking techniques to create animated GIFs, timelapses, or videos.
Conclusion
Taking a screenshot on your Chromebook is a simple process, and there are lots of different methods that you can use to get the job done. Whether you’re a beginner or an advanced user, it’s important to understand how to take a screenshot, as this is a useful tool that can save you time and effort when it comes to documenting and sharing information. With this guide, you’ll have everything you need to start experimenting with your Chromebook’s screenshot options and discovering all of the benefits that this powerful tool has to offer.