Introduction
Flowers have the power to brighten up any space and bring joy to our lives. However, their beauty is fleeting, and they wither away within a few days. Pressing flowers is an excellent way to preserve their delicate beauty and keep them with us for a long time. In this article, we will be exploring the art of pressing flowers, from the history and benefits of this technique to the step-by-step process of creating pressed flower art.
Pressed-to-Perfection: A Complete Guide to Pressing Flowers
What is flower pressing?
Flower pressing involves flattening and drying flowers and leaves to preserve their natural shape and color. Pressing flowers is an ancient technique that has been used for many years to create art, decorate homes, and preserve beautiful memories.
History of flower pressing
Flower pressing can be traced back to the Victorian era, where it was a popular pastime for women. They would press flowers and create beautiful collages and scrapbooks. Before the invention of modern flower presses or microwaves, flowers were pressed between the pages of books or heavy objects. Today, flower pressing has evolved into a thriving art form and hobby that is enjoyed by people of all ages.
Benefits of pressing flowers
There are numerous benefits to pressing flowers. Preserving flowers allows you to keep and display your favorite blooms for years to come. Additionally, pressed flowers can be turned into beautiful art pieces or used for handmade cards and invitations. Flower pressing is also a great way to learn about different types of flowers, their unique characteristics, and how to display them creatively.
Preserve Your Memories: Step-by-Step Guide to Pressing Flowers
Types of flowers that can be pressed
Virtually any flower can be pressed, but some species are better suited for the technique than others. Flowers with thin petals, such as pansies, violets, and daisies, are ideal for pressing, while flowers with thick, fleshy petals, like roses and carnations, don’t work as well.
Materials needed for flower pressing
To press flowers, you will need some basic materials, including a flower press, blotting paper, and cardboard or heavy books. A flower press is a specialized tool designed to press and dry flowers evenly. It consists of two wooden plates, held together by screws or straps, with layers of cardboard or blotting paper between them.
Step-by-step guide to pressing flowers
Follow these steps to press your flowers:
- Select fresh flowers and gently remove any dirt or insects.
- Cut the stems off the flowers and discard them.
- Place a piece of blotting paper on one of the wooden plates and arrange the flowers on top.
- Add another piece of blotting paper on top of the flowers.
- Repeat this process, placing layers of cardboard or blotting paper between each flower layer and plate until you have filled the press.
- Tighten the screws or straps on the press.
- Place the press in a warm, dry place and leave it for two to four weeks.
- After the flowers are fully dried, carefully remove them from the press and use them in your artwork or decoration.
Flower Pressing 101: Tips and Tricks for Beginners
Tips for selecting flowers
When selecting flowers for pressing, look for blooms that are in good condition and have no blemishes or signs of wilting. Choose flowers with flat, thin petals for the best results.
Preparation before pressing
Before pressing your flowers, make sure they are clean and dry. Remove any stray leaves or stems, and lightly dust the petals with a soft brush.
Techniques for pressing flowers
There are several techniques you can use to press flowers, including the traditional book pressing method, using a flower press, or using a microwave. Book pressing involves placing the flowers between the pages of a heavy book and leaving them to dry for a few weeks. Using a flower press is the most effective method for pressing flowers, as it ensures even pressure and faster drying. To use the microwave method, arrange the flowers between two sheets of paper and microwave them for a few seconds.
Common mistakes to avoid
The most common mistake beginners make when pressing flowers is overloading the press. Remember to leave enough space between the flowers to ensure they dry evenly. Another mistake is not waiting long enough for the flowers to dry completely, which can cause discoloration or mold growth.
DIY Tutorial: How to Press Flowers and Create Artful Decor
Ideas for using pressed flowers
Pressed flowers can be used in a variety of ways, including creating art pieces, decorating home interiors, making flower petals, and even creating colorful jewelry.
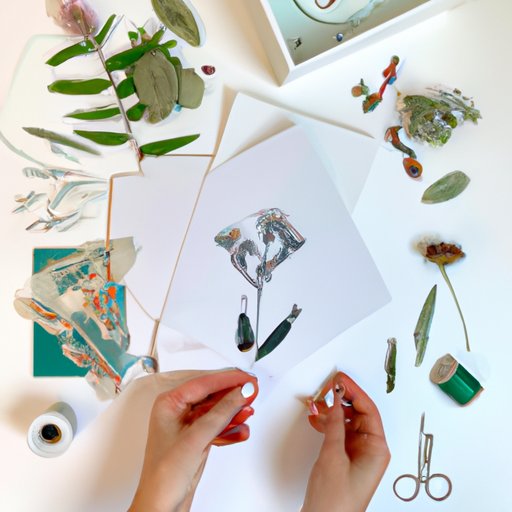
Step-by-step tutorial for creating pressed flower art
To create a pressed flower art piece, follow these steps:
- Select a clear frame that can be filled with flowers.
- Choose a variety of colorful flowers, and press them using a flower press or microwave.
- Arrange the pressed flowers in a pleasing pattern, and secure them with glue or double-sided tape.
- Use a white or neutral background to showcase the flowers.
- Hang your pressed flower art in a prominent spot and enjoy.
From Garden to Book: How to Press Flowers for Long-term Preservation
How to press flowers for long-term preservation
To preserve your flowers for a long time, use a flower press or a book that won’t damage the petals. Cut the stem of the flowers and arrange it on the piece of paper in the book or press. Wait for at least two weeks to ensure the flowers are fully dried and then carefully remove them.
Creating a flower press book
Flower press books are a unique way to preserve memories, and it’s relatively easy to make one yourself. You’ll need a hole punch, a binder, and some cardboard or thick paper. Punch holes in the paper and tie the binder around them to create pages. Arrange the flowers between the pages, and let them dry.
Pro Tips for Perfectly Pressed Flowers: Get Creative with Your Botanicals
Advanced techniques for pressing flowers
Advanced techniques for pressing flowers include using a dehydrator, pre-treating flowers, and using a microwave for a shorter drying time. These techniques require specific knowledge and expertise and are best for experienced flower pressers.
Using pressed flowers in different ways
Pressed flowers can be used in many creative ways, including as a natural dye, confetti, lampshades, and even soap-making. The possibilities are endless when it comes to using these natural beauties.
Flower Framing Made Easy: A Guide to Pressing and Displaying Your Favorites
Step-by-step guide to framing pressed flowers
To frame your pressed flowers, follow these steps:
- Choose a frame that will fit your pressed flowers.
- Arrange the pressed flowers in a pleasing pattern on a neutral background.
- Cover the flowers with glass, and secure it in place.
- Attach a hanger to the back of the frame, and hang it in a prominent spot.
Ideas for creating a flower gallery wall
A flower gallery wall is a beautiful way to display your pressed flowers. Choose a variety of frames and create a collage of different floral art pieces, and arrange them to make a charming flower wall.
Conclusion
Summary of the article
Flower pressing is an ancient technique that has evolved into a popular hobby and art form. Through this article, we have explored the history, benefits, and step-by-step process of pressing flowers, along with some ideas for using pressed flowers creatively.
Encouragement to start pressing flowers
Pressing flowers is a great way to preserve your favorite blooms and create beautiful, artistic pieces that will last for many years. So, get started, and see the magic of flower pressing unfold.
Final thoughts
Flowers are ephemeral, but their beauty is everlasting, thanks to the art of flower pressing. Whether you’re a beginner or an experienced presser, this guide will help you create beautifully preserved flowers that will brighten up your home and bring joy to your life.