I. Introduction
There is nothing quite as satisfying as indulging in a bowl of homemade ice cream on a hot summer day. Not only is it a fun activity to do with friends and family, but it also allows you to customize flavors to your liking. In this article, we will provide you with a comprehensive guide on how to make homemade ice cream so that you can experience the joy of creating and enjoying your own ice cream creations.
II. Step-by-step guide
To make homemade ice cream, here are all the ingredients and equipment you will need:
- 2 cups heavy cream
- 1 cup whole milk
- 3/4 cup granulated sugar
- 1 teaspoon vanilla extract
- Pinch of salt
- Ice cream maker
- Bowl and whisk or electric mixer
- Saucepan
- Freezer-safe container
Once you have all the ingredients and equipment ready, follow these simple instructions:
- In a saucepan, heat the milk and sugar over medium heat until the sugar has completely dissolved.
- Add the heavy cream, vanilla extract, and salt to the saucepan and stir until well combined.
- Remove the saucepan from heat and let it cool completely.
- Pour the mixture into an ice cream maker and churn according to the manufacturer’s instructions. This typically takes around 20-30 minutes.
- Transfer the ice cream to a freezer-safe container and freeze for at least 2-3 hours or until it reaches your desired consistency.
- Serve and enjoy!
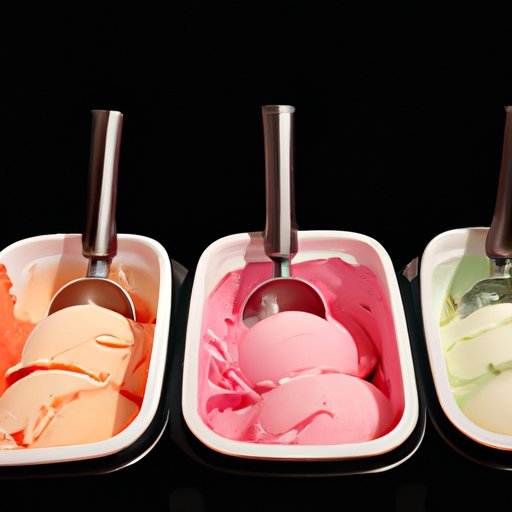
III. Flavors
One of the best things about making homemade ice cream is the endless flavor possibilities. Here are some of the most popular flavors:
- Vanilla
- Chocolate
- Strawberry
- Mint chocolate chip
- Cookies and cream
If you’re feeling adventurous, try making some unique and unusual flavors such as avocado, honey lavender, or even balsamic vinegar. Here are the recipes for each:
- Avocado: puree 2 ripe avocados and add them to the ice cream mixture before churning. Optional: add a tablespoon of lime juice for a tangy twist.
- Honey lavender: steep 2 teaspoons of dried lavender buds in 1/2 cup of hot water for 10 minutes. Strain the mixture and add it to the ice cream mixture along with 1/4 cup of honey.
- Balsamic vinegar: reduce 1/2 cup of balsamic vinegar in a saucepan over medium heat until it thickens. Add the reduced vinegar to the ice cream mixture before churning.
Each flavor can be served with a variety of toppings such as fresh fruit, whipped cream, or chocolate sauce.
IV. Dietary restrictions
For those with dietary restrictions, there are homemade ice cream recipes that cater specifically to your needs. Here are some popular recipes:
- Vegan: substitute the heavy cream and whole milk with 2 cans of coconut milk and add 1/2 cup of sugar, 1/4 cup agave nectar, and 1 teaspoon vanilla extract to the mixture before churning.
- Keto: substitute the granulated sugar with 1/2 cup of monk fruit sweetener and the whole milk with 1 cup of almond milk. Add 1 teaspoon of vanilla extract and 1 teaspoon of xanthan gum to the mixture before churning.
- Gluten-free: substitute all-purpose flour with gluten-free flour and ensure all ingredients used are also gluten-free. Use the same recipe as the step-by-step guide.
It is important to note that these recipes may have different textures than traditional ice cream, but they are just as delicious.
V. Equipment options
If you don’t have an ice cream maker, there are affordable options available. An ice cream ball can be purchased for under $30 and allows you to make ice cream by rolling the ball around. Another option is to use a stand mixer with an ice cream maker attachment, which can cost around $80 but is more versatile than a dedicated ice cream maker.
VI. Tips and tricks
To achieve the perfect homemade ice cream, here are some tips to keep in mind:
- Use high-quality ingredients: the better the quality, the better the taste.
- Chill the mixture before churning: this will help reduce the time needed for churning and prevent the ice cream from melting too quickly.
- Add mix-ins after churning: if using mix-ins such as cookie dough or fruit, add them in the last 5 minutes of churning to prevent them from sinking to the bottom.
- Store properly: homemade ice cream should be stored in an airtight container in the freezer. If storing for longer periods, place a piece of plastic wrap directly on top of the ice cream to prevent freezer burn.
VII. Conclusion
In conclusion, making homemade ice cream is not only a fun and satisfying activity, but it also allows for endless flavor possibilities. With the right ingredients, equipment, and tips, anyone can create delicious and unique ice cream creations. We encourage our readers to try making their own ice cream and experiment with different flavors.