Introduction
Splinters are tiny but painful foreign objects lodged in the skin. They can come from wood, metal, glass, or any material that can break into sharp pieces. If not removed promptly and safely, a splinter can cause infection and further complications. There are different methods of removing a splinter, and this article will provide a step-by-step guide on various techniques and important tips to keep in mind.
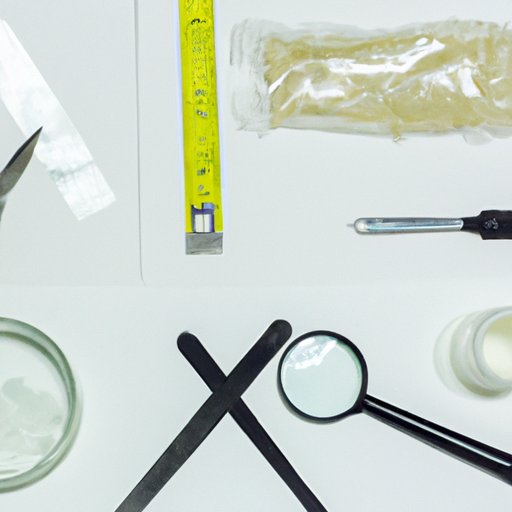
Using Tweezers
One of the most common and effective methods of removing a splinter is using tweezers. Here are the steps:
- Disinfect the area around the splinter with rubbing alcohol.
- Using sterilized tweezers, grasp the splinter as close to the skin as possible and pull it out gently but firmly.
- Wash the area with soap and water and apply antiseptic cream or ointment.
Note that if the splinter is too small to grip with tweezers, try to widen the skin around it with a sterilized needle or pin, then use tweezers to remove it.
When using tweezers, it’s important to:
- Disinfect the tweezers before and after use.
- Choose tweezers with a pointed tip for easy and precise gripping.
- Avoid squeezing or pushing the splinter deeper into the skin, as this can cause more pain and complications.
Duct Tape
Another unconventional but effective method to remove a splinter is using duct tape. Here’s how:
- Clean and dry the affected area.
- Cut a small piece of duct tape that can cover the entire splinter.
- Place the duct tape over the splinter and press it down firmly.
- Peel off the tape slowly and carefully. The splinter should come out with the tape.
- Clean the area with soap and water, then apply antiseptic cream or ointment.
The benefits of using duct tape include:
- It’s painless and doesn’t require puncturing the skin.
- It can remove even the smallest and most stubborn splinters.
However, using duct tape also has drawbacks:
- It may not work for deeply embedded splinters or those with a large surface area.
- It may cause skin irritation or allergic reactions.
Baking Soda Paste
Baking soda paste is an age-old remedy for removing splinters. Here’s how it works:
- Mix a teaspoon of baking soda with enough water to form a thick paste.
- Apply the paste over the splinter and the surrounding skin.
- Cover the area with a bandage and leave it on for a few hours.
- Remove the bandage and rinse the area with water.
- The splinter should come out naturally or be easy to remove with tweezers.
- Clean the area with soap and water and apply antiseptic cream or ointment.
The alkaline properties of baking soda help to draw the splinter out of the skin and reduce inflammation. Baking soda paste is also gentle and safe for sensitive skin.
Needle and Sterilizing It
Using a needle is a common but more invasive method of removing a splinter. Here’s how to do it safely:
- Sterilize a needle or pin by holding it over a flame until it turns red-hot or dipping it in rubbing alcohol or hydrogen peroxide.
- Wash your hands and disinfect the area around the splinter with rubbing alcohol.
- Gently prick the skin at one end of the splinter with the sterilized needle.
- Use the needle to pry up the splinter and pull it out gently with tweezers.
- Wash the area with soap and water and apply antiseptic cream or ointment.
It’s important to sterilize the needle and avoid pushing the splinter deeper into the skin. Also, using a needle carries a risk of infection or injury, so it’s best to seek medical attention if the splinter is deep or large.
Magnifying Glass
A magnifying glass can be a useful tool for removing small splinters that are hard to see with the naked eye. Here’s how to use it:
- Disinfect the area around the splinter with rubbing alcohol.
- Hold the magnifying glass over the splinter to magnify and pinpoint its location.
- Use sterilized tweezers to grip and remove the splinter gently.
- Wash the area with soap and water and apply antiseptic cream or ointment.
Note that a magnifying glass should not replace proper lighting and visual inspection in removing a splinter. Also, be careful not to burn the skin with the sun’s rays magnified by the glass.
Natural Oils
Many natural oils, such as olive oil, coconut oil, or tea tree oil, have antibacterial and anti-inflammatory properties that can help to remove splinters. Here’s how to do it:
- Apply a few drops of the natural oil over the splinter and the surrounding area.
- Cover the area with a bandage and leave it on overnight.
- Remove the bandage and check if the splinter has either come out or can be easily removed with tweezers.
- Clean the area with soap and water and apply antiseptic cream or ointment.
Natural oils are gentle and safe for most skin types and can also prevent infection or scarring. However, they may not work for deeply embedded or infected splinters.
Soaking the Affected Area
Soaking the affected area is a simple and non-invasive technique that can help to loosen and soften the skin around the splinter. Here’s how to do it:
- Add a tablespoon of Epsom salt or baking soda to a bowl of warm water.
- Soak the affected area for 10-15 minutes.
- Dry and clean the area, then try to remove the splinter with tweezers or a needle.
Soaking can help to reduce pain and inflammation and make splinter removal easier. However, it may not work for all types of splinters, especially those with a larger surface area or those located in hard-to-reach places.
Conclusion
Removing a splinter can be a simple and painless procedure if done correctly. The key is to act promptly and choose the most suitable method for the type and depth of the splinter. Here’s a summary of the important tips and precautions:
- Wash your hands and disinfect the area before and after removing a splinter.
- Avoid pushing or squeezing the splinter deeper into the skin.
- Choose appropriate tools, such as tweezers, needles, or natural oils.
- Sterilize your tools and avoid infection or injury.
- Apply antiseptic cream or ointment and monitor the area for any signs of infection.
With these techniques and tips, you can safely and efficiently remove a splinter and avoid unnecessary pain and complications.