I. Introduction
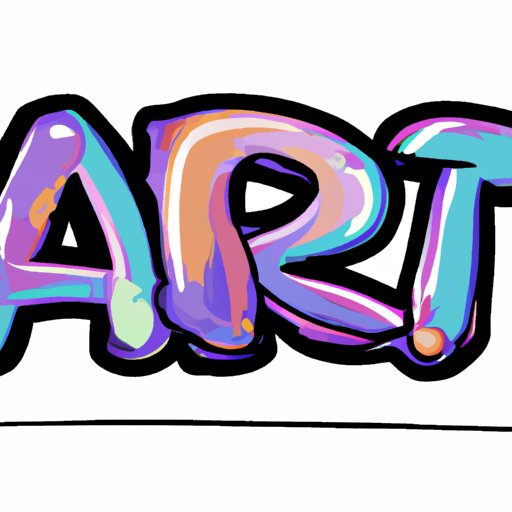
If you’ve ever seen graffiti or comic books, you’ve likely seen bubble letters. These letters are rounded, bold, and full of character. Bubble letters have become increasingly popular for their fun, eye-catching design. Learning how to draw bubble letters is a great way to boost your lettering skills, and can be used for a variety of creative projects.
II. The Beginner’s Guide to Drawing Bubble Letters: Simple Steps to Improve Your Lettering Skills
To start drawing bubble letters, you’ll need a few basic materials; a pencil, eraser, paper, and any colored markers or pens you want to use. Start by practicing with pencil and paper to make sure you can get the basic shape right before adding any shading or color.
One tip for drawing neat, evenly spaced letters is to use a ruler or other straight edge to mark off lines where you want your letters to be. This helps keep them uniform and consistent.
To create basic bubble letters:
- Write the letter as you normally would, but add extra space between each line. For example, in the letter “A,” you would add a line across the top, bottom, and in the middle.
- Next, add a curved line around each straight line. Make sure the curves are symmetrical and follow the shape of the letter evenly.
- Erase the inside lines, leaving only the bubble-shaped outline of the letter.
- Add any color or shading you want to finish the design.
Practice exercises can help you master this basic technique. Try writing each letter of the alphabet as a bubble letter, and practice making samples of different letter combinations.
III. Unleash Your Creative Side: Tips and Tricks for Drawing Eye-Catching Bubble Letters
Once you’ve learned the basics, it’s time to add some creativity to your design. Here are some tips for taking your bubble letters to the next level:
- Using different colors and shading can add depth and dimension to your letters. Consider using gradients, highlights, and shadows to create a more realistic appearance.
- Adding decorative elements like swirls, stars, or hearts can really make your letters pop. These can be added around the edges, or within the letter itself.
- Experiment with different letter styles to create unique designs. Some popular styles include block letters, graffiti-style letters, and comic book-style letters.
- Check out examples of eye-catching bubble letter designs online or in books to get ideas and inspiration.
IV. Mastering Bubble Letters: From Basic Shapes to Stylish Sketches
Once you’ve mastered the basic technique of bubble letters, you can start designing more complex shapes. You can break down bubble letters into basic shapes like circles, rectangles, and triangles.
For example, to create a bubble letter “B,” you would start with two circles, one on top of the other. Then, add a straight line down the middle, and connect the circles with curved lines. Erase any unnecessary lines, then add color or shading as desired.
Experiment with different fonts and styles to create unique and stylish bubble letters. Try adding different sizing to your letters to create a more dynamic look.
V. Bubble Letters 101: A Step-by-Step Tutorial for Any Skill Level
Here’s a step-by-step tutorial for creating basic bubble letters:
- Start with a pencil and paper.
- Write the letter you want to bubble, making it larger than normal.
- Draw an outline around the letter, with equal space between the outline and the letter itself.
- Add an extra outline, again with equal space between this and the previous outline.
- Draw curved lines to connect the two outlines you’ve drawn.
- Color in the bubble letter to finish the design.
Tips for creating different styles of bubble letters, including fancy and decorative ones:
- Consider adding flourishes such as vines and floral designs, especially to letters like A, B, and F.
- Use a 3D design to make your dance, jazz up the letters with a fire effect, or create a cloud-colored letter for a child-themed artwork.
- Coloring each bubble inside with different colors or coloring with different shades of the same color can be an option for eye-catching aesthetics.
Example designs to help inspire creativity:

VI. Become a Pro at Bubble Letters with These Easy-to-Follow Techniques
By now, you’ve probably got the basics under your belt. Here are some tips for advancing your bubble letter skills:
- Experiment with 3D effects and perspective. Try rotating letters or adding shadows to really make them stand out.
- Practice drawing bubble letters quickly and accurately, so you can sketch them out without much effort.
- Use bubble letters in art and design projects, such as posters, flyers, and invitations.
VII. Breaking Down Bubble Letters: How to Create Stunning Typography in Minutes
Typography is the art of arranging and designing letters in a visually appealing way. Here’s how you can use bubble letters in typography designs:
- Pair bubble letters with other font styles for a unique and multi-dimensional effect.
- Consider layering bubble letters with different colors, patterns, or images to create interesting and eye-catching designs.
Examples of stunning bubble letter typography designs:

VIII. Conclusion
In conclusion, bubble letters are a fun and creative way to add personality to your lettering. Whether you’re a beginner or a pro, there’s always something new to learn when it comes to bubble letters. Remember to practice often, experiment with different styles, and have fun with it!
You can use bubble letters for a variety of purposes, from personal art projects to professional design work. Learning how to draw bubble letters opens up a new world of possibilities for expressing your creativity.
So, grab a pencil, some paper, and start practicing! With the tips and techniques outlined in this article, you’ll be drawing eye-catching bubble letters in no time.