I. Introduction
Having healthy, shiny hair is a top priority for many people, but with different hair types and various factors that can damage hair, it isn’t always easy. A hot oil treatment is a quick and easy way to nourish, heal, and condition your hair from the inside out. In this article, we will provide a step-by-step guide on how to do a hot oil treatment, discuss ingredient-based options, explain how to customize a treatment for different hair types, compare at-home and salon treatments, offer some DIY hot oil treatment recipes, and discuss the benefits of incorporating hot oil treatments into your hair care routine.
II. Step-by-Step Guide
A hot oil treatment works by penetrating the hair shaft to moisturize and nourish it, improving the overall health, strength, and appearance of your hair. Follow these simple steps to learn how to do a hot oil treatment at home:
- Choose your oil: different oils have different properties, so choose one that suits your hair type and needs (see Section III). Common options include coconut oil, olive oil, avocado oil, jojoba oil, and argan oil.
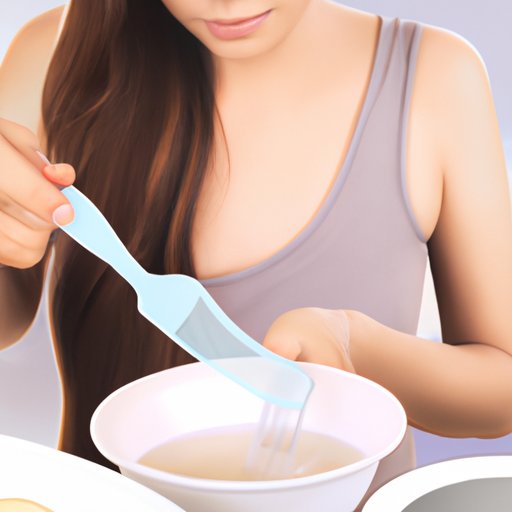
- Warm the oil: use a double boiler or place the oil in a bowl and warm it using a hot water bath (not the microwave). The oil should be warm but not too hot to avoid burning your scalp.
- Apply the oil: starting at the roots, apply the oil to your hair section by section, using a comb or your fingers to distribute it evenly. Massage your scalp gently for a few minutes to increase blood flow to the hair follicles.
- Wrap your hair: after applying the oil, cover your hair with a shower cap or towel to help the oil penetrate your hair more deeply. You can also use a heated cap or a hair dryer on a low heat setting to increase the effectiveness of the oil.
- Wait: depending on the instructions provided with your oil, leave it on your hair for 20-30 minutes or longer for deeper conditioning.
- Shampoo and rinse: after the waiting time, shampoo your hair thoroughly to remove the oil. You may need to rinse your hair multiple times to get all of the oil out. Finish with a cool rinse to help close the hair cuticle and lock in moisture.
Note: Avoid leaving the oil in your hair overnight, as it can lead to scalp buildup and cause more harm than good. Also, it is recommended not to use a hot oil treatment more than once a week to avoid over-conditioning.
III. Ingredient-Based
Hot oil treatments can be customized based on the ingredients used, allowing you to target specific hair concerns and hair types. Here are some common ingredients and their benefits when used in a hot oil treatment:
- Coconut oil: a natural moisturizer that can penetrate the hair shaft, preventing breakage and split ends.
- Olive oil: rich in vitamins and antioxidants, it can help reduce dandruff, promote hair growth, and add shine.
- Avocado oil: high in monounsaturated fats and Vitamin E, it strengthens and nourishes hair from the inside out.
- Jojoba oil: similar to the natural oils produced by the scalp, it can help regulate oil production, control frizz, and improve scalp health.
- Argan oil: known as “liquid gold,” it is a lightweight oil that can hydrate and revive dull and damaged hair, making it softer and more manageable.
The amount of oil used can vary depending on hair length and thickness, but a general rule of thumb is to start with 2-3 tablespoons of oil and adjust as necessary. For best results, use a high-quality, pure oil without any additives or preservatives.
Tips: You can also add essential oils (such as peppermint, rosemary, or tea tree oil) to your hot oil treatment for extra benefits and a pleasant scent. However, be sure to dilute them properly and do a patch test first to avoid any allergic reactions.
If you don’t have access to a particular oil or want to combine different oils for a more potent treatment, you can experiment with different ratios and see what works best for your hair.
IV. Hair Type
Not all hair is created equal, and different hair types require different care and attention. Here are some specific steps for doing a hot oil treatment for various hair types:
- Curly hair: use a heavier oil, such as castor oil, and skip the combing to avoid disrupting your curl pattern. Cover your hair with a shower cap and a microfiber towel for extra heat retention.
- Colored hair: avoid using hot oil treatments immediately after coloring your hair, as it can cause the color to fade or change. Wait for at least a week before doing a hot oil treatment, and ask your stylist for advice on the best oil to use based on your hair color.
- Chemically treated or damaged hair: use a protein-based oil (such as keratin oil) or a blend of oils for a deep conditioning treatment. Don’t leave the oil on for too long to avoid over-conditioning, and avoid using heat styling tools until your hair is fully recovered.
You can also adjust the frequency and intensity of your hot oil treatments based on your hair type and needs. For example, curly hair may benefit from a weekly treatment, while straight hair may only need one every other week.
V. At-Home vs. Salon Treatment
Now that you know how to do a hot oil treatment at home, you may be wondering whether to choose the at-home or salon option for your hair concerns. Here are some pros and cons of each option:
- At-home: more affordable, convenient, and customizable, but may require some trial and error to find the right oil and ratio for your hair, and the results may vary depending on your technique and equipment.
- Salon: more professional, consistent, and luxurious, but more expensive, time-consuming, and you may not be able to control the ingredients used in the treatment.
If you have a sensitive scalp, a complicated hair condition, or want to indulge in a spa-like experience, a salon treatment may be worth the investment. However, if you prefer to save some money and experiment with different oils and techniques, doing a hot oil treatment at home may be the better option.
VI. DIY Hot Oil Recipes
If you want to try making your own hot oil treatment at home using common kitchen ingredients, here are some easy recipes to get you started:
- Coconut oil and honey: mix 1/4 cup coconut oil and 1 tablespoon honey in a bowl and warm the mixture. Apply to your hair and wrap it in a towel for 30 minutes, then shampoo and rinse.
- Olive oil and avocado: mix 2 tablespoons olive oil and 1/2 mashed avocado in a blender and warm the mixture. Apply to your hair and leave it on for 20 minutes, then shampoo and rinse.
- Jojoba oil and lavender: mix 2 tablespoons jojoba oil and 5-10 drops of lavender essential oil in a bowl and warm the mixture. Apply to your hair and cover it with a shower cap for 30 minutes, then shampoo and rinse.
Note: Keep in mind that these recipes may not be suitable for all hair types and may require some experimentation to find the right ratio and timing for your hair.
VII. Benefits of a Hot Oil Treatment
In addition to promoting hair health and growth, there are many benefits to incorporating a hot oil treatment into your hair care routine:
- Reduces frizz and flyaways
- Softens and detangles hair
- Prevents breakage and split ends
- Soothes a dry and itchy scalp
- Improves the overall texture and appearance of hair
By using a hot oil treatment regularly, you can achieve healthier, more vibrant hair that looks and feels great.
VIII. Conclusion
Doing a hot oil treatment is a simple yet effective way to care for your hair and prevent damage or dryness. Whether you choose an ingredient-based option, customize it for your hair type, or experiment with DIY recipes, a hot oil treatment can provide numerous benefits and help you achieve your hair goals. So next time you need to indulge in some hair care self-care, grab your favorite oil, warm it up, and follow our step-by-step guide to enjoy a nourishing, restorative hot oil treatment that will leave your hair looking and feeling amazing.