I. Introduction
Like all appliances, your coffee maker requires regular cleaning to maintain its optimal performance and ensure your coffee tastes great every time. Over time, coffee oils and mineral deposits from tap water can accumulate in the machine, leading to clogs, slow brewing, or even a burnt taste. In this article, we’ll guide you through a step-by-step process to clean your coffee maker, and share common mistakes you should avoid. By the end of this article, you’ll know all you need to about cleaning your coffee maker and have a better brew!
II. Step-by-Step Guide for Cleaning a Coffee Maker
To clean your coffee maker like a pro, follow these simple steps:
A. Unplugging the coffee maker
Before you start cleaning, make sure your coffee maker is unplugged and cool to the touch.
B. Disassembling the coffee maker
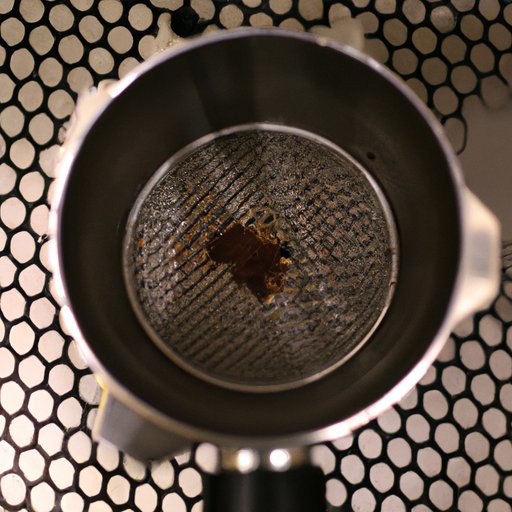
Remove any removable parts such as the carafe and filter basket. If there are any other detachable components, take them apart as well.
C. Cleaning each part separately using a vinegar and water solution
In a container, mix a solution of equal parts white vinegar and water. Dip a cloth or sponge in the solution and use it to clean the exterior of the machine and its parts. For the interior of the machine, fill the water tank with the same solution and run the brewing cycle. Discard the solution and run the brewing cycle again with clean water.
D. Reassembling the coffee maker
Make sure all the parts are dry before putting them back together. Reattach the parts in reverse order to how you took them apart.
E. Running a cycle of clean water through the coffee maker
After reassembling the machine, fill the water tank with clean water and run a brewing cycle. Discard the water and repeat once more to ensure all vinegar residue is removed.
F. Drying the coffee maker thoroughly
Allow the coffee maker to dry thoroughly before using it again. Reattach any plastic parts once they are completely dry.
III. Common Mistakes Made While Cleaning a Coffee Maker
Here are some common cleaning mistakes to avoid:
A. Not removing the filter basket or carafe
Many cleaning solutions cannot reach the insides of these components if not removed, so be sure to take them out before cleaning the coffee maker.
B. Not using a vinegar and water solution
Many experts prefer the use of a vinegar and water solution for cleaning a coffee maker, as it effectively removes built-up minerals and residue. Water alone cannot dissolve these mineral deposits in tap water, leading to clogs.
C. Not cleaning the removable parts separately
All parts of the coffee maker that can be removed should be cleaned separately to ensure thorough cleaning. This includes the carafe, lid, and filter basket.
D. Not drying the coffee maker properly
Even small amounts of leftover moisture from cleaning can cause mold and mildew, so always ensure your coffee maker is dried thoroughly before reassembling it.
E. How to avoid these mistakes
To avoid these mistakes, follow the steps on the guide above carefully and regularly clean your coffee maker. Test your cleaning by brewing a pot of coffee to ensure the machine is running smoothly.
IV. Using Vinegar and Water Solution for Cleaning
Using a vinegar solution is a cost-effective and natural way to clean your coffee maker. Here are some tips to help you clean more effectively:
A. Benefits of using vinegar and water solution
Cleaning your coffee maker with vinegar and water solution can help remove mineral build-up, improve the taste of your coffee, and reduce the need for harsh chemical cleaners.
B. How to make the solution
Mix equal parts white vinegar and water in a container.
C. How to use the solution effectively
Using a cloth or sponge, apply the solution to the exterior of the coffee maker and its parts. For the interior, fill the water tank with the same solution and run the brewing cycle. Discard the solution and run the brewing cycle again with clean water.
D. Alternative cleaning agents to use with the coffee maker
Aside from vinegar, baking soda or lemon juice can be also used as natural cleaning agents. However, vinegar is still widely used because of its acidic properties that can dissolve mineral build-up.
V. Commercial Coffee Maker Cleaner Agent
A. Benefits of commercial coffee maker cleaner
Commercial coffee maker cleaners are designed to remove mineral build-up, stains, and improve the taste of your coffee. They are also effective in removing coffee oils and residues that are difficult to remove with just vinegar and water solution.
B. How to use the cleaner
Follow the instructions on the cleaner carefully to ensure proper cleaning and avoid any damage to the machine. Generally, you’ll need to mix the cleaner with water, apply it to the machine, and then run a brewing cycle with clean water.
C. Precautions to take while using the cleaner
Always follow the instructions provided by the manufacturer. Wear gloves when using the cleaner, and ensure that you do not ingest the cleaning solution.
D. Alternative cleaning agents to use with the coffee maker
Baking soda and lemon juice may also be used with a commercial cleaner instead of vinegar if you prefer a natural option.
VI. Frequency of Cleaning
A. Reasons to clean the coffee maker frequently
Cleaning the coffee maker frequently improves the taste of your coffee and guarantees the longevity of your machine. It also prevents the growth of mold and bacteria.
B. Frequency of cleaning depending on usage of the coffee maker
If you use your coffee maker daily, it is recommended to clean it once a month. If you only use it occasionally, cleaning once every two to three months will suffice.
VII. Parts of Coffee Maker That Require Frequent Cleaning
A. Water tank
The water tank should be cleaned at least once every month to remove mineral build-up.
B. Filter basket
The filter basket should be cleaned after each use to prevent the accumulation of coffee oils and residue.
C. Carafe
The carafe should be cleaned after each use and should be soaked with a vinegar solution once a month to remove stains and mineral build-up.
D. How to clean these parts effectively
These components can be cleaned using a vinegar and water solution or commercial cleaner. A soft cloth or sponge can be used to wipe off accumulated residue. Brush or toothbrush can help clean the nooks and crannies.
VIII. Tips and Tricks to Maintain the Coffee Maker Between Cleanings
A. Regular descaling
To prevent mineral build-up, you can regularly use commercial coffee maker descalers or run a cycle of vinegar and water solution.
B. Use of filtered water
Using filtered water can help prevent mineral build-up and improve the taste of your coffee.
C. Using a coffee maker cover
Covering your coffee maker when not in use can prevent dust and other particles from entering the machine.
D. Summary of tips and tricks
Regular maintenance like descaling, using filtered water, and keeping your coffee maker clean is key to consistent and good-tasting coffee.
IX. Conclusion
A. Recap of the importance of cleaning a coffee maker
A clean coffee maker guarantees better taste and longevity of your machine. Neglecting regular cleaning can lead to clogs, slow brewing, and even a burnt taste.
B. Summary of the key points
We have outlined a step-by-step guide to cleaning your coffee maker, identified common cleaning mistakes, and offered tips and tricks to maintain your machine between cleanings.
C. Final thoughts and recommendations
Regular cleaning is key to maintaining your coffee maker and having a good brew every time.