I. Introduction
Is your vinyl siding looking faded or outdated? Perhaps you’re considering a renovation, but the cost of replacing your siding is holding you back. The good news is that painting your vinyl siding can give your home a fresh, updated look without breaking the bank.
In this article, we will guide you through the process of painting vinyl siding, from selecting the right paint to finishing touches. You will learn about the benefits of painting your vinyl siding, mistakes to avoid, and tips for achieving a professional finish.
II. “Revamp Your Home’s Exterior: Tips and Tricks for Painting Vinyl Siding”
Painting your vinyl siding can do wonders for your home’s curb appeal. Not only will it protect your siding from the elements, but it also provides an opportunity to switch up the color and style of your home. Here are some tips for selecting the right paint and successful surface preparation:
A. Benefits of painting vinyl siding:
Painting your vinyl siding can significantly improve the appearance of your home. It can also add value to your property and lengthen the lifespan of your siding. It’s a much cheaper option than replacing your entire siding system, and it can dramatically change your home’s look for the better.
B. Tips for selecting the right paint:
Not all paints are created equal. For the best results, choose a high-quality acrylic paint that’s specifically formulated for vinyl siding. Avoid using dark colors, as they tend to attract heat and may cause the siding to warp or buckle. Additionally, lighter colors can reflect more sunlight and keep your home cooler.
C. Importance of surface preparation:
Proper surface preparation is essential for a long-lasting, professional finish. Begin by washing your vinyl siding with soapy water and rinsing thoroughly. Allow the surface to dry completely before moving on to the next step. Then, use a scraper or sander to remove any loose or peeling paint, followed by a primer to ensure that the paint adheres properly.
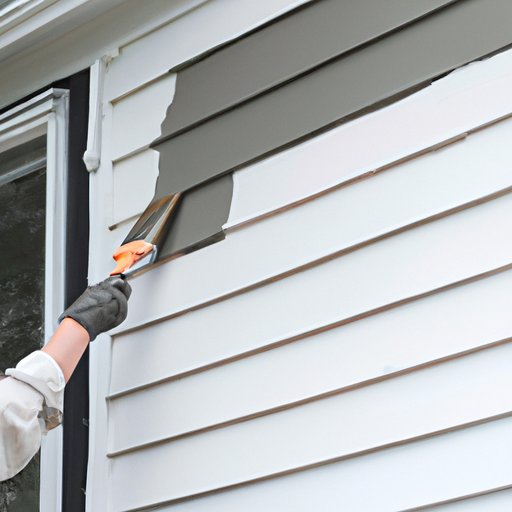
D. Techniques for painting vinyl siding:
When it comes to painting your vinyl siding, it’s best to use a paint sprayer for smooth, even coverage. However, if you don’t have a paint sprayer, a roller or brush will also work. If you’re using a sprayer, be sure to follow the manufacturer’s instructions and wear proper protective gear. When using a roller or brush, use long, even strokes and work in small sections at a time.
III. “Painting Vinyl Siding 101: Everything You Need to Know”
A. Explanation of vinyl siding:
Vinyl siding is a popular choice for homeowners due to its low cost, durability, and ease of maintenance. It’s made from a type of plastic called polyvinyl chloride (PVC), which is resistant to moisture, pests, and extreme temperatures. While vinyl siding comes in a variety of colors and textures, it can still benefit from a fresh coat of paint every few years for an updated look.
B. How paint works on vinyl siding:
Paint can effectively adhere to vinyl siding, but it’s important to choose the right type of paint. Vinyl siding expands and contracts with temperature changes, so it’s crucial to use a paint that’s formulated for this type of substrate. Acrylic paint is the best option, as it’s flexible and can withstand the expansion and contraction of the vinyl. Avoid using oil-based paint, as it can crack and peel over time.
C. Steps for painting vinyl siding:
The steps for painting vinyl siding are relatively straightforward, but they require proper preparation and attention to detail. Begin by cleaning the surface as mentioned earlier. You’ll then need to remove any caulk around doors and windows and replace it with new caulk. Finally, prime and paint your siding, working in small sections at a time, and allow each coat to dry completely before moving on to the next.
D. Different types of paint that can be used on vinyl siding:
As mentioned earlier, acrylic paint is the best type of paint to use on vinyl siding. However, not all acrylic paints are created equal. Look for a paint that’s specifically designed for vinyl siding, with a thickness of 10-12 mils for optimal coverage. This type of paint will account for the expansion and contraction of the vinyl, ensuring that it won’t crack or peel over time.
IV. “Transforming Your Home: The Pros and Cons of Painting Vinyl Siding”
A. Advantages of painting vinyl siding:
One of the most significant benefits of painted vinyl siding is that it’s significantly less expensive than a full siding replacement. Additionally, painting can protect your siding from the elements and extend its lifespan. You’ll have a wide range of color options to choose from, and you’ll have the freedom to switch up your home’s look whenever you want.
B. Disadvantages of painting vinyl siding:
While there are many advantages of painting vinyl siding, there are also some drawbacks to consider. For example, painting vinyl siding will require periodic touch-ups and may not last as long as a full replacement. Additionally, some homeowners report that paint can make their siding look less “natural,” detracting from the original appearance of the siding.
C. Comparison of painting vinyl siding vs. replacing it:
If your vinyl siding is severely damaged or outdated, it may be more cost-effective to replace it entirely. However, if your siding is in decent condition and you’re looking to update its appearance, painting your vinyl siding is a great option. Painting is significantly less expensive than a full replacement and can often be completed in less time.
V. “Upgrade Your Curb Appeal: Step-by-Step Guide to Painting Vinyl Siding”
If you’re ready to tackle your vinyl siding painting project, follow these step-by-step instructions:
A. Steps for preparing vinyl siding for painting:
Begin by cleaning the surface with soapy water and a scrub brush. Rinse thoroughly and allow the surface to dry completely. Then, remove any loose or peeling paint with a scraper or sander. Apply a coat of primer to the siding and allow it to dry before moving on to the next step.
B. Painting techniques for vinyl siding:
Before painting, mask any areas you don’t want to paint and cover the ground with a drop cloth. If you’re using a sprayer, begin by spraying the corners and edges to ensure even coverage. Next, move on to the main area of the siding, working in small sections at a time. If you’re using a roller or brush, apply the paint with long, even strokes, working in small sections at a time.
C. Finishing touches for painted vinyl siding:
Once you’ve painted the siding, remove any masking tape and allow the paint to dry completely. Inspect the surface for any missed spots or areas that need touch-ups. Finally, stand back and admire your newly painted vinyl siding!
VI. “Painting Your Vinyl Siding: Common Mistakes to Avoid”
A. Common mistakes made when painting vinyl siding:
One of the most common mistakes that homeowners make when painting vinyl siding is using the wrong type of paint. Using paint that’s not formulated for vinyl can lead to peeling, cracking, and an uneven finish. Another common mistake is not properly preparing the surface for painting, which can lead to inadequate adhesion and a shorter lifespan for the new paint.
B. How to prevent these mistakes from happening:
Preventing these mistakes requires proper planning and attention to detail. Choose an acrylic paint that’s specifically designed for vinyl siding and ensure that the surface is adequately cleaned and primed before painting. Also, be sure to avoid painting in direct sunlight, as it can cause the paint to dry too quickly and lead to an uneven finish.
C. Tips for achieving a professional-looking finish:
If you’re looking to achieve a professional-looking finish, start by investing in high-quality paint and tools. Choose an acrylic paint that’s specifically formulated for vinyl siding and use a paint sprayer for best results. Apply the paint in thin, even coats, and work in small sections at a time. Finally, be patient and allow each layer to dry completely before moving on to the next.
VII. “DIY vs. Professional: Which Route to Choose When Painting Vinyl Siding”
A. Pros and cons of DIY painting:
The main advantage of DIY painting is that it’s significantly less expensive than hiring a professional. Additionally, painting your vinyl siding can be a fun, satisfying project to tackle on your own. However, it can also be time-consuming, and if you’re not experienced in painting, you may end up with an uneven finish.
B. Pros and cons of hiring a professional:
Hiring a professional to paint your vinyl siding will likely result in a smooth, even finish and save you time and effort. However, it can be expensive, and you’ll need to do your research to find a reputable, experienced painter.
C. Factors to consider when making the decision:
When deciding whether to DIY or hire a professional, consider your budget, timeframe, and level of experience. If you’re confident in your painting skills and have the time to tackle the project, DIY may be the way to go. However, if you’re short on time, lack experience, or want the peace of mind that comes with hiring a professional, it may be worth the extra cost.
VIII. Conclusion
Congratulations – you’re now equipped with all the tools and knowledge necessary to paint your vinyl siding like a pro! Remember: proper surface preparation and paint selection are crucial for a long-lasting, professional finish. If you’re not comfortable tackling the project on your own, don’t hesitate to hire a professional.