Introduction
If you’ve ever attended a party or perused an upscale bakery, you’ve likely encountered the trendiest dessert of the decade: cake pops. These bite-sized treats on a stick are not only cute and portable, but also endlessly customizable to suit any theme or occasion. However, making cake pops can be a bit finicky and intimidating, especially for beginners. That’s where we come in! In this article, we’ll guide you through the process of making cake pops from scratch- with only a handful of ingredients and tools. Whether you want to whip up a batch for a holiday party or simply as a fun indoor activity, our step-by-step tutorial will ensure your cake pops are picture-perfect and delicious. Along the way, we’ll also share creative decorating ideas, troubleshooting tips, and variations on the classic recipe for all your cake pop cravings.
Step-by-Step Tutorial
Before we get started with the actual process of making cake pops, let’s gather our ingredients and equipment. Here’s what you’ll need:
- Boxed cake mix (flavor of your choice)
- Canned frosting (complementary flavor to cake mix)
- Candy coating (color of your choice)
- White chocolate chips or melts (optional)
- Sprinkles, sanding sugar, or other decorations of your choice (optional)
- Lollipop sticks
- Bowls, spoons, and toothpicks for dipping and decorating
- Baking sheet, wax paper, and refrigerator or freezer for chilling
Once you’ve gathered your supplies, let’s dive into the step-by-step tutorial for making cake pops:
- Bake the boxed cake mix according to its instructions and let it cool completely.
- Crumble the cooled cake into a large bowl until it resembles fine crumbs.
- Add about 1/3 to 1/2 cup of canned frosting to the cake crumbs and mix thoroughly until a sticky, moldable dough forms. (You can adjust the amount of frosting based on the texture and moistness of the cake- you want it to be pliable but not mushy.)
- Roll the dough into uniform balls that are about 1-1.5 inches in diameter. Place them on a wax paper-lined baking sheet and let them chill in the refrigerator or freezer for at least 20 minutes, until firm.
- In a microwave-safe bowl or double boiler, melt the candy coating (making sure to stir frequently and avoid overheating). You can also add a few tablespoons of melted white chocolate chips or melts to the candy coating for extra flavor or creaminess.
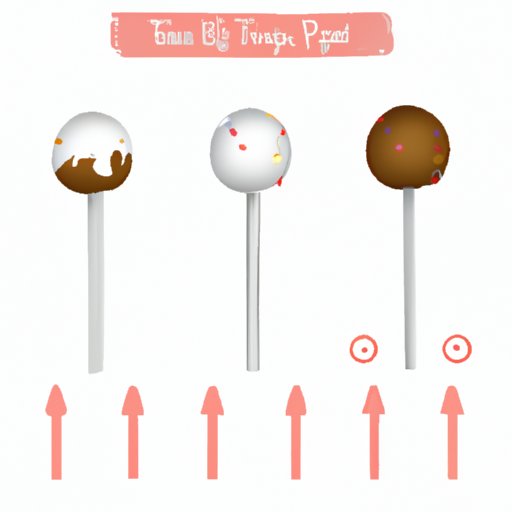
- Take the chilled cake balls out of the fridge/freezer and insert a lollipop stick into each one, about halfway through the ball. Dip the ball into the melted candy coating, using a spoon to cover it completely and let the excess drip off. Use a toothpick to poke any air bubbles or excess coating around the stick. Place the coated cake pop back on the wax paper and let it dry completely before moving on to decorating.
Congratulations- you’ve made basic cake pops! From here, you can customize them in a multitude of ways. Read on for some creative decorating ideas and tips for troubleshooting common problems.
Creative Decorating Ideas
If you want to take your cake pops to the next level of creativity and fun, try out these decorating ideas:
- Use a contrasting color of candy coating to drizzle stripes or swirls onto the base coat of the cake pop. You can do this by using a toothpick or piping bag and working quickly before the coating sets.
- Dip the top of the cake pop into a bowl of sprinkles, sanding sugar, or crushed nuts for added texture and color. You can even mix and match different kinds of decorations to make each cake pop unique.
- Use edible markers or paints to draw designs or faces onto the hardened cake pop surface. This is especially fun for holiday-themed pops like pumpkins or reindeer.
- Add mini fondant or gum paste decorations such as flowers, letters, or animals onto the cake pop by using a tiny bit of melted candy coating as glue. These add an extra layer of whimsy and elegance to your pops.
To make sure your decorations stick and don’t crack while drying, try these decorating tips:
- Let the base coat of the cake pop dry completely before adding decorations.
- If your decorations aren’t sticking, brush a tiny amount of corn syrup or simple syrup onto the surface before attaching them.
- Avoid putting too much pressure or moisture on the cake pop surface, which can cause the candy coating to crack or soften.
Troubleshooting Common Problems
Even experienced bakers can run into issues when making cake pops- it’s just a part of the process! Here are some common problems you might encounter and how to solve them:
- The cake-pop mixture is too crumbly or dry: Try adding more frosting or a small amount of melted butter until the mixture is moldable.
- The cake-pop mixture is too wet or mushy: Try adding more cake crumbs or refrigerating the mixture for a bit until it firms up.
- The candy coating is too thick or clumpy: Try adding a bit of vegetable oil or shortening to the coating to thin it out. You can also microwave it for a few seconds at a time to get it to a more fluid consistency.
- The candy coating won’t adhere to the cake pop or slides off: Try letting the cake balls chill in the fridge or freezer for longer before dipping, or make sure they aren’t warm or oily when you start to coat them.
Variations on Traditional Recipe
If you’re feeling adventurous or have dietary restrictions to consider, there are endless variations you can make on the classic cake pop recipe. Here are just a few ideas:
- Use gluten-free or vegan cake mixes and frostings to make these treats accessible to all diets.
- Add fruit purees or extracts to the cake mix for interesting flavor combinations, such as lemon poppyseed or strawberry shortcake.
- Experiment with alternative coatings, such as melted peanut butter chips, caramel sauce, or cream cheese frosting.
- Incorporate mix-ins into the cake pop mixture, such as crushed cookies, chopped nuts, or mini chocolate chips.
Creating a Theme
One of the best things about cake pops is how versatile they are when it comes to themes and occasions. Here are some tips for creating a cohesive theme for your cake pops:
- Think about the colors and flavors associated with the theme you want to create- for example, red and green for Christmas or pastel shades for Easter.
- Consider the shapes and decorations that would make sense for your theme- for example, bat or ghost shapes for Halloween or heart shapes for Valentine’s Day.
- Don’t be afraid to enlist the help of friends or family members to brainstorm or execute your theme.
Conclusion
Cake pops may seem like a trendy or daunting dessert to make, but with our step-by-step tutorial, decorating ideas, troubleshooting tips, variations, and theme creation advice, we hope you feel more confident and excited to try them out. Don’t forget to experiment with different flavors, colors, and decorations to make your cake pops truly your own.