The Ultimate Guide to Mouse Pad Maintenance: Keeping Your Pad Clean and Comfortable
As computer users, most of us spend countless hours using our mouse pads every day. However, many of us don’t take the time to clean and maintain our mouse pads regularly. Over time, dirt, grime, and oil can build up on your mouse pad, making it less comfortable to use and even decreasing its lifespan. In this article, we’ll provide you with a comprehensive guide to cleaning your mouse pad, covering everything from regular maintenance to deep cleaning and removal of stubborn stains.
Why Regular Maintenance is Important
Mouse pads accumulate dirt, sweat, and oil over time, which can lead to an unpleasant odor and an unhygienic workspace. Worse yet, a dirty mouse pad can affect the accuracy and speed of your mouse movements, making your time spent at the computer less productive and less comfortable. By performing regular maintenance, you can remove dirt and grime and extend the lifespan of your mouse pad, making for a more comfortable and productive workspace.
How Often to Clean Your Mouse Pad
The frequency with which you clean your mouse pad will depend on how often you use it. If you’re a heavy user, you should aim to clean your mouse pad every week. If you’re a more casual user, once a month should suffice. Pay attention to any signs of dirt or grime buildup, and adjust your cleaning frequency accordingly.
Tools and Supplies for Regular Maintenance
Cleaning your mouse pad doesn’t require a lot of specialized tools or supplies. In fact, most of what you’ll need can be found around the house. Here’s what you’ll need for regular maintenance:
- A soft microfiber cloth or cotton ball
- Mild soap or detergent
- Water
Be sure to avoid using any harsh chemicals or abrasive cloths that could damage the surface of your mouse pad.
5 Simple Steps for Cleaning Your Mouse Pad and Getting Rid of Dirt and Grime
Cleaning your mouse pad is a quick and straightforward process. Here are the five steps to follow:
Step 1: Remove Loose Dirt and Dust
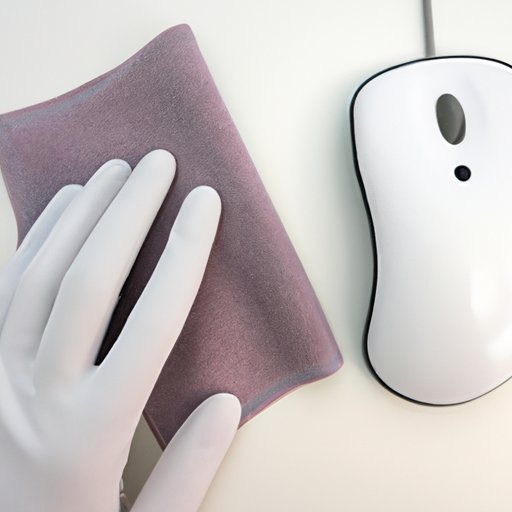
Begin by wiping your mouse pad with a soft microfiber cloth or a cotton ball to remove any loose dirt and dust. This step will help prevent any particles from being ground further into the surface of your mouse pad during the next steps of the cleaning process.
Step 2: Soak Your Mouse Pad
Fill a sink or basin with lukewarm water and a small amount of mild detergent or soap. Soak your mouse pad in the water for 5-10 minutes to allow any dirt and grime to loosen up.
Step 3: Wash Your Mouse Pad
After soaking, use your soft cloth or sponge to gently wash your mouse pad. Do not scrub too hard, or you risk damaging the surface of the pad. Rinse your mouse pad thoroughly to remove any traces of soap or detergent.
Step 4: Dry Your Mouse Pad
After washing, gently squeeze out excess water from your mouse pad and lay it flat on a clean, flat surface to air dry. Alternatively, you can dry your mouse pad with a hairdryer on low heat. Do not use high heat, or you risk warping the surface of the pad.
Step 5: Condition Your Mouse Pad
If your mouse pad is made of a soft fabric or rubber, consider conditioning it with a specialized mouse pad cleaner. Apply a small amount of the cleaner to a soft cloth and rub it onto the surface of your mouse pad. Leave the conditioner to soak for a few minutes, then give your mouse pad a quick rinse to remove any residue.
DIY Mouse Pad Cleaning: How to Make Your Own Natural Cleaning Solution at Home
If you prefer to use natural cleaners instead of store-bought cleaners, making your own natural cleaning solution is simple and easy. Here’s how to make your own:
Materials Needed:
- White vinegar
- Baking soda
- Water
- A spray bottle
Instructions:
- Mix a solution of equal parts white vinegar and water in a spray bottle.
- Spray the solution onto your mouse pad, being careful not to soak it.
- Sprinkle baking soda over the solution and allow it to sit for a few minutes.
- Scrub your mouse pad gently with a soft cloth or sponge, then rinse it thoroughly with water.
- Squeeze out excess water and air dry your mouse pad as outlined in Step 4 above.
The Benefits of Using Natural Cleaners
Natural cleaning solutions, like the mixture above, are beneficial for several reasons. They are environmentally friendly, inexpensive, and safe to use, with no harsh chemicals or artificial scents. Plus, using natural cleaners can help you avoid allergic reactions or skin irritation caused by the harsh chemicals found in some store-bought cleaners.
The Dos and Don’ts of Mouse Pad Cleaning: Avoiding Costly Mistakes and Keeping Your Pad in Top Shape
While cleaning your mouse pad is a straightforward process, there are a few common mistakes you should avoid to prevent damage. Here are some dos and don’ts to keep in mind:
Do:
- Use a mild detergent or soap to clean your mouse pad.
- Allow your mouse pad to air dry before using it.
- Use a soft microfiber cloth or cotton ball to clean your mouse pad.
- Test any new cleaning solution on a small, inconspicuous area of your mouse pad before using it to clean the entire pad.
- Replace your mouse pad if it becomes excessively damaged or worn.
Don’t:
- Scrub too hard, as it can cause damage to the surface of your mouse pad.
- Use harsh chemicals or abrasive cleaning materials on your mouse pad.
- Put your mouse pad in the washing machine or dryer.
- Allow your mouse pad to dry in direct sunlight or high heat.
Step-by-Step Guide to Deep Cleaning Your Mouse Pad: Removing Stubborn Stains and Extending the Life of Your Pad
While regular maintenance is important, sometimes your mouse pad may need a more thorough cleaning to remove stubborn stains or deep-seated dirt. Here’s how to deep clean your mouse pad:
Materials Needed:
- A mild cleaner or detergent
- A soft-bristled brush or toothbrush
Instructions:
- Apply a small amount of mild detergent to the stained area of your mouse pad.
- Using a soft-bristled brush or toothbrush, gently scrub the stained area in circular motions.
- Rinse your mouse pad thoroughly to remove any remaining detergent or cleaner.
- Dry your mouse pad as outlined in Step 4 above.
Additional Tips:
If your mouse pad is made of a soft fabric or rubber, consider conditioning it after deep cleaning as outlined in Step 5 above. Moreover, it is a good idea to avoid eating or drinking while using your computer, as this can lead to spills on your mouse pad.
Expert Tips for Mouse Pad Cleaning: What You Need to Know to Keep Your Workspace Clean and Productive
We interviewed experts in the field for additional tips and insights on mouse pad cleaning. Here’s what they recommended:
Tip #1: Incorporate Mouse Pad Cleaning into Your Workspace Cleaning Routine
Cleaning your mouse pad doesn’t have to be a chore. Instead, make it a part of your daily or weekly workspace cleaning routine. Not only will this keep your mouse pad clean and fresh, but it will also help reduce the overall time and effort required to keep your workspace clean.
Tip #2: Use Disinfectant Wipes for Quick Cleanings
If you don’t have time for a full cleaning, or if your mouse pad needs a quick refresh, try using a disinfectant wipe. These wipes remove dirt and sanitize your mouse pad in seconds, making them a convenient and effective option for when you’re short on time.
Tip #3: Avoid Exposing Your Mouse Pad to Direct Sunlight
Exposing your mouse pad to direct sunlight and high heat can damage the surface and cause warping. Instead, dry your mouse pad in a cool, shaded area to avoid damage.
Conclusion
Cleaning your mouse pad is an essential part of maintaining a clean and comfortable workspace. By performing regular maintenance, deep cleaning, and avoiding harmful cleaning methods, you can extend the lifespan of your mouse pad and keep it looking and feeling brand new for years to come.